
How to create a Custom Screen Saver in Windows 7
If you have a collection of pictures that you would like to have displayed as your screen saver, the Photos screen saver is one of the Screen Saver options in Windows 7 that can be used to create your own screen saver. The Pictures library may contain files you don't wish to use. To work around this, create a new folder for the pictures you wish to use and copy the pictures into this folder.
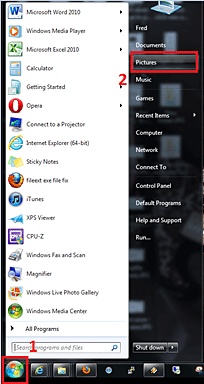
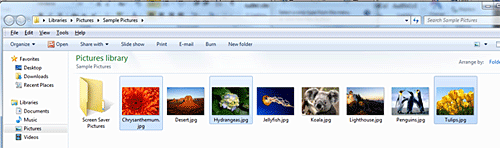
- Click Start button and click on Pictures.
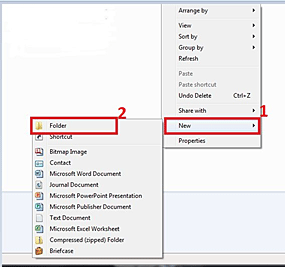
- In the Pictures library, right-click in the folder to reveal the context menu. Click New and then Click Folder.
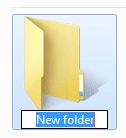
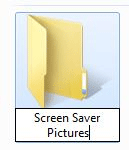
- The new Folder will be highlighted in blue. Type your name for the folder (e.g. Screen Saver Pictures) and click away from the folder to set the name.
- Select the pictures you want to place in the folder. You can select individual files by holding down the Ctrl key and clicking the items. Or, if your pictures are in a group, click the first picture push down Shift key and hold it. Then, click the last one.
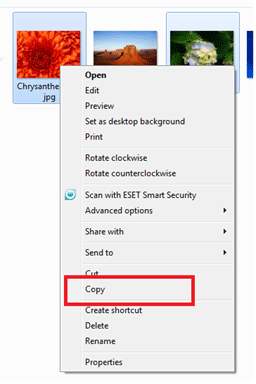
- Right-click on any one of the selected pictures (they will be highlighted in blue) and choose Copy from the context menu.
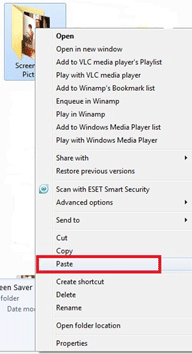
- Move your pointer to the folder you created, right-click and the folder, and choose Paste from the context menu. The pictures will be pasted into the folder.
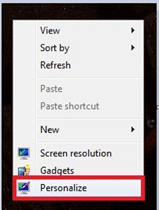
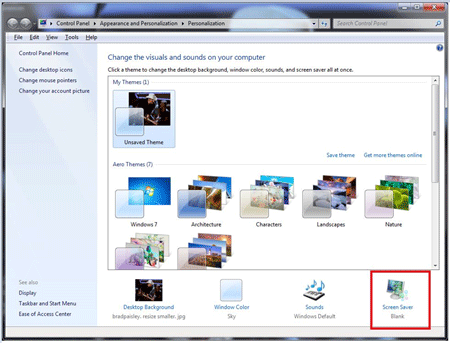
- Once you have your pictures in the folder, open the Screen Saver window. Right-click on the desktop, then left-click on Personalize.
- Click on Screen Saver in the lower right of the Change the visuals and sounds on your computer window.
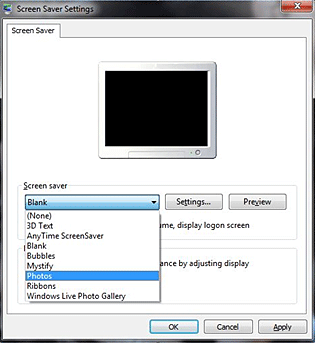
- Click the screen saver options box and choose Photos.
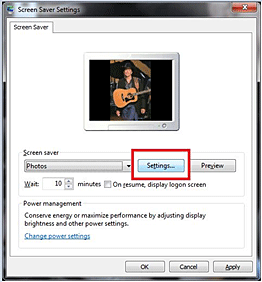
- Click the Settings button to open the Photos Screen Saver Settings window.
- In the Use Pictures From: area click Browse and then navigate to the folder where your pictures are stored. Click OK.
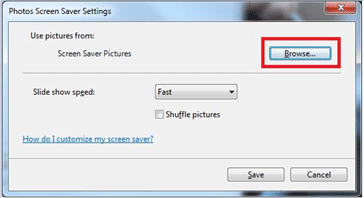
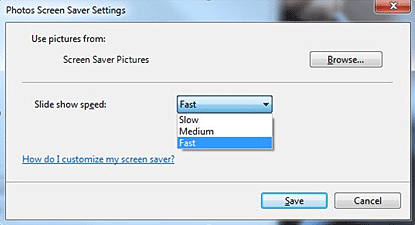
- In the Slide show speed area click the speed option with the down arrow and choose your desired speed: Slow, Medium, or Fast.
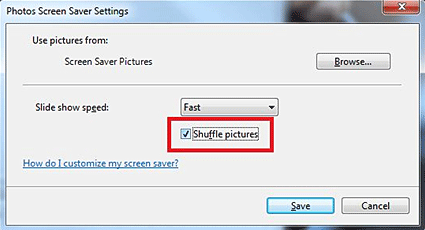
- Put a check on the Shuffle pictures box if you want to display the pictures in a random order. If choose not to, the pictures will be displayed in the order of their file names.
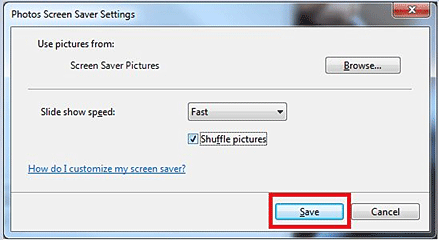
- Click the Save button at the lower right of the Photo Screen Saver Settings window. This will go back to the Photos Screen Saver Settings window.
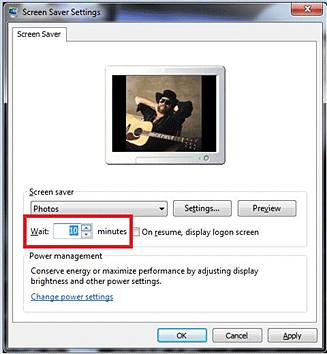
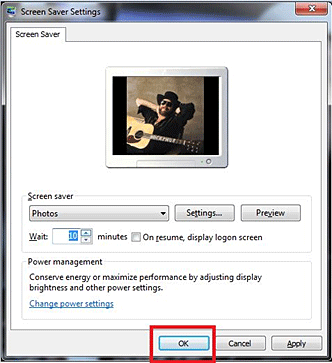
- On the Screen Saver Settings windows, choose your time to wait before the screen saver. Type in the number of minutes next to the Wait: option. Or, use the up and down arrows to the right of the time displayed to adjust it higher or lower.
- Click OK to close the Window. Your screen saver will display after the computer has been idle for the time interval you chose.
Use the two steps above to copy and paste pictures into the Screen Saver Pictures folder until you have all the pictures you want copied into the folder. Close the folder.
Technical Support Community
Free technical support is available for your desktops, laptops, printers, software usage and more, via our new community forum, where our tech support staff, or the Micro Center Community will be happy to answer your questions online.
Forums
Ask questions and get answers from our technical support team or our community.
PC Builds
Help in Choosing Parts
Troubleshooting